Cubs, Brownies, Guides and Scouts

We would like to thank the Saxlingham Cubs, Brownies, Guides and Scouts for for coming to the Church for their meetings this week.

The meetings started with Lynn doing a short tour of the church – talking about the bells, the font and the stained glass and some of the memorials.  We then split into groups.

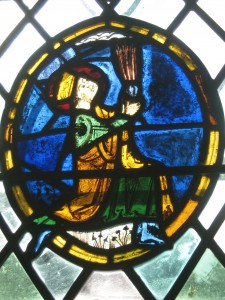
Edmund offering his arrows

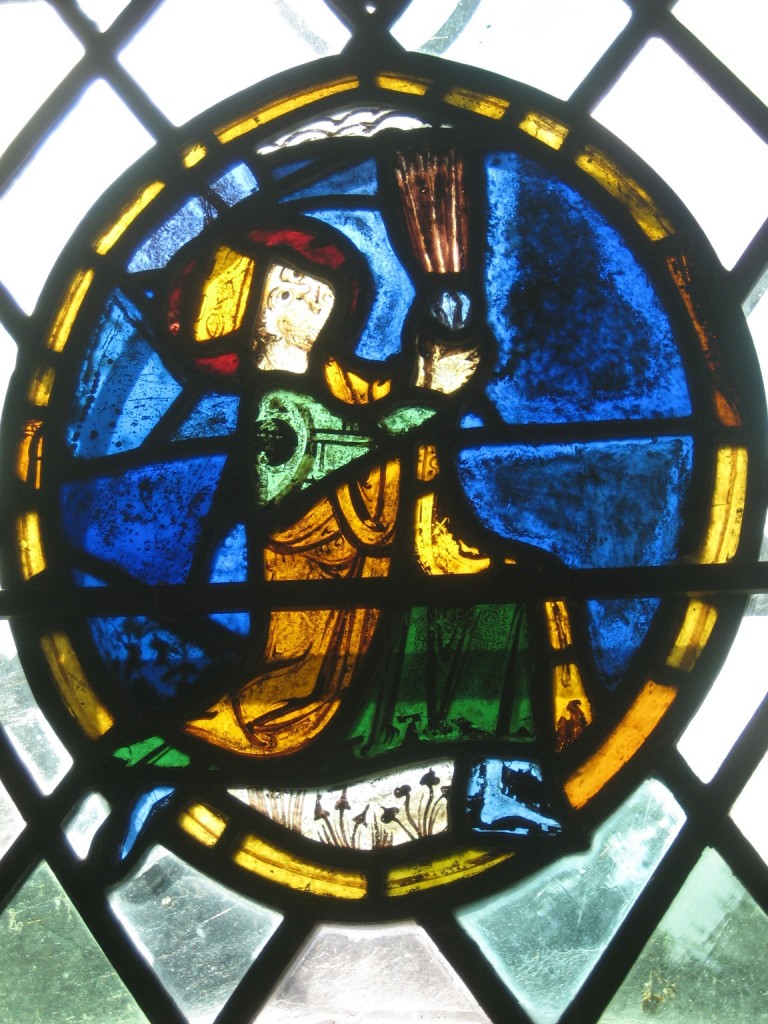
Edmund, King of East Anglia, offering up the arrows of his martyrdom

For the Cubs and Brownies we had three groups – one colouring a drawing of the window of St. Edmund, one completing the Church Trail Quiz and the third…hand bell-ringing!

For the Guides and Scouts we had two groups – one for the Church Trail Quiz and the other hand bell-ringing.

We hope everyone enjoyed learning about the church.  We were very pleased to find a total of 92 enthusiastic hand bell ringers over the course of the week – we hope some will return to ring the hand bells again and move on to the new bells in the future!


Genealogy workshop – 21st September

There is still time to sign up to the second Genealogy workshop – please send an email to info@saxlinghambells.org.uk to reserve your place.

The workshop will take place in the Church Room between 10am and 12.30pm.  Refreshments will be provided.

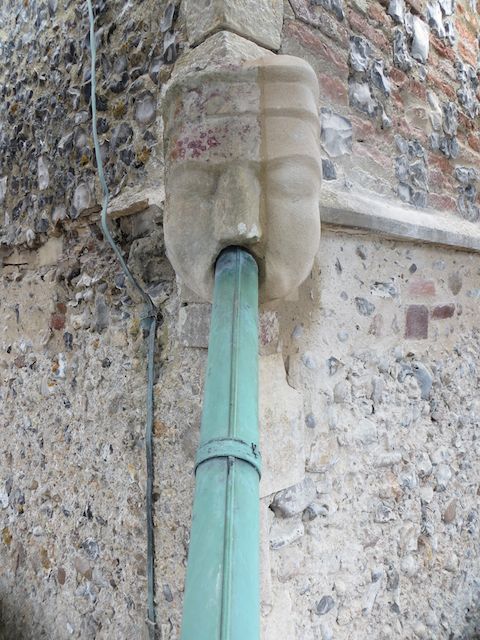
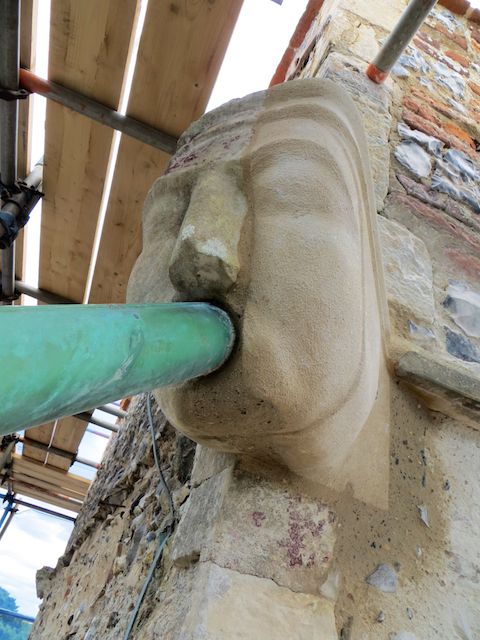
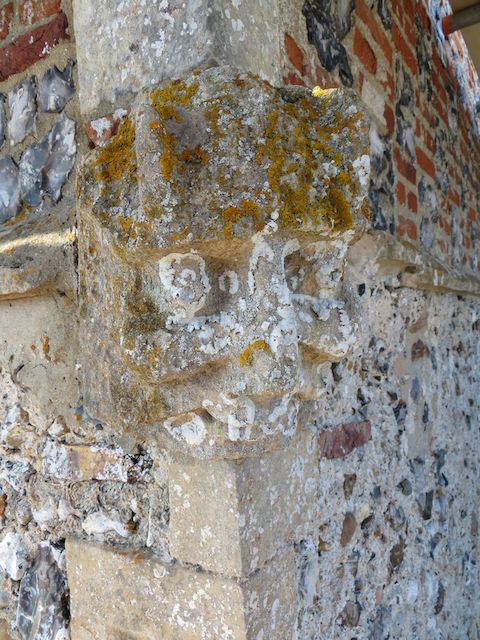
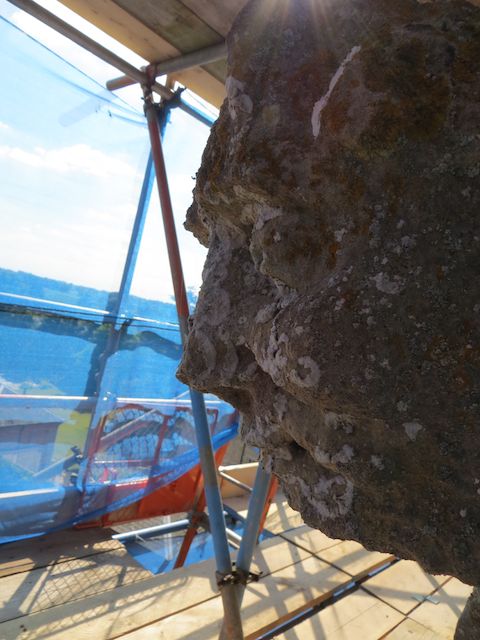
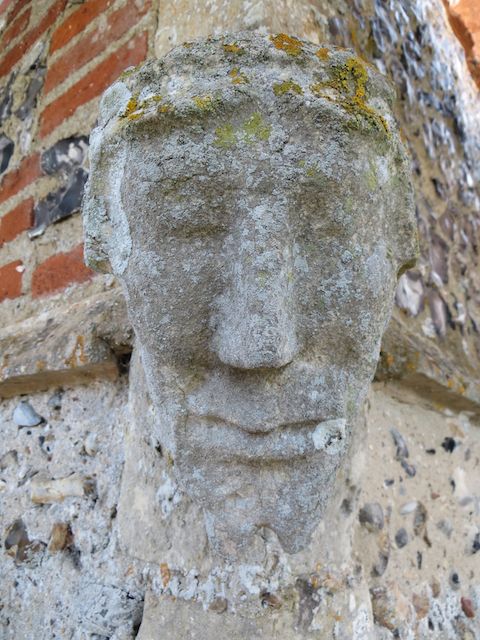
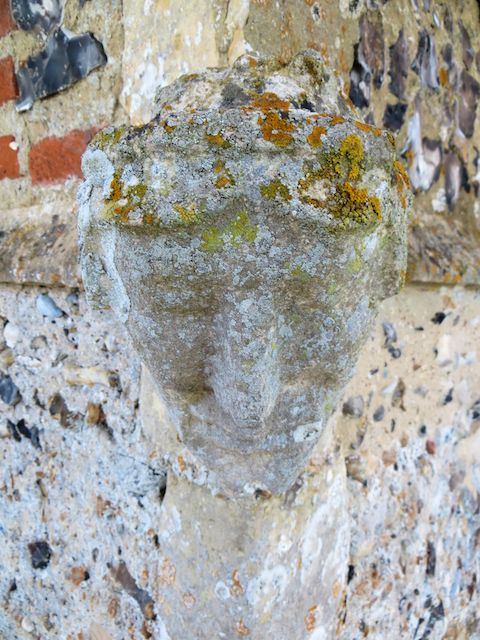
The finished gargoyle

Brett, the stone mason, has finished carving the gargoyle.   For pictures of the first day of carving please click here.

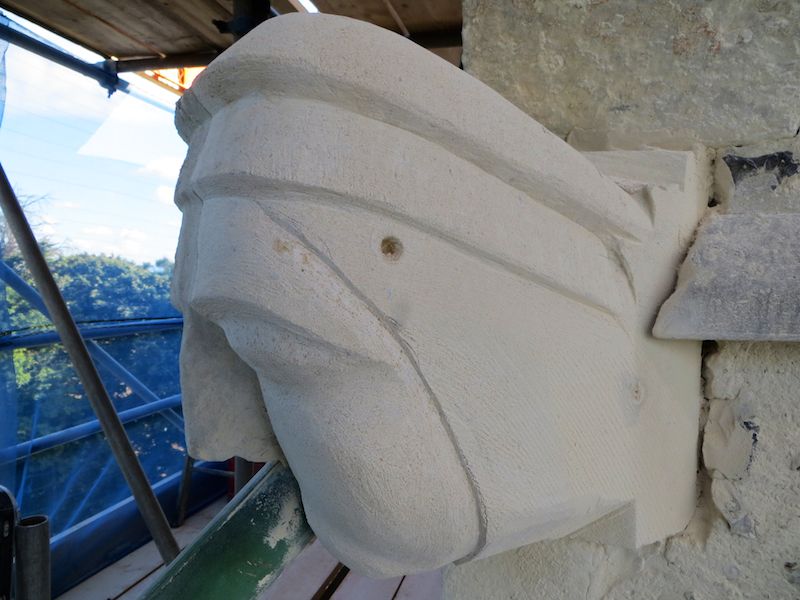
Day two of carving - the line framing the face

Day two of carving – the line framing the face

Day two of carving - cheek taking shape

Day two of carving – cheek taking shape

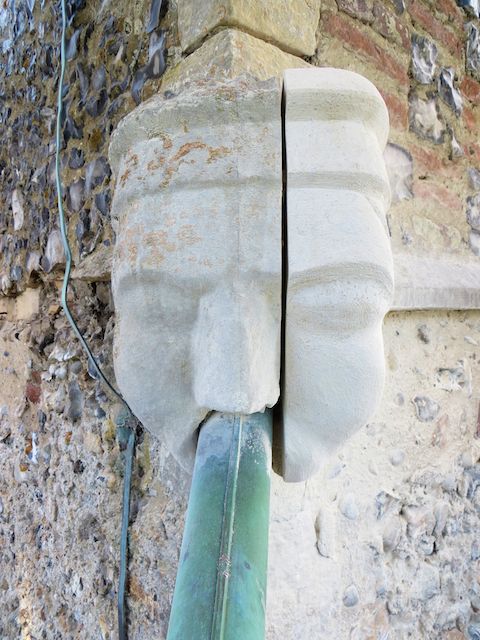
In the pictures below the lime mortar in the joins is fresh and has not had time to dry.  It will dry to the colour of limestone and the join will be very hard to see.  We will post a picture in a few days once the mortar has had time to dry out.

Finished gargoyle - front view

Finished gargoyle – front view

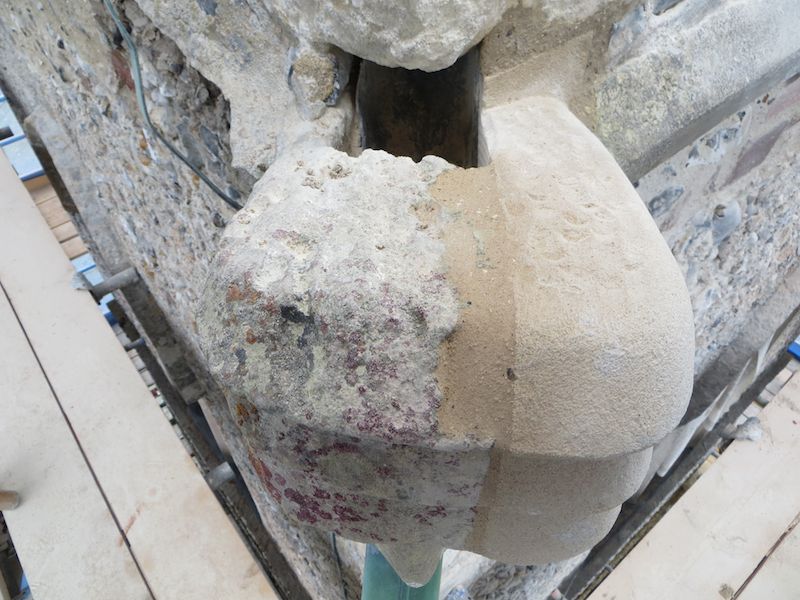
Top view - note the dimpling and join to the tower

Top view – note the dimpling and join to the tower

Showing the join underneath and the cheek

Showing the join underneath and the cheek

The underneath join tapers into the tower wall – it is not a sharp angle.  The next picture shows the join on the old side.

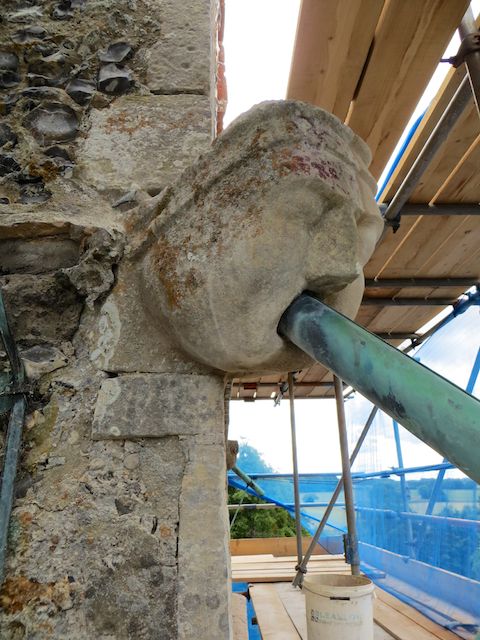
From the old side of the gargoyle

From the old side of the gargoyle

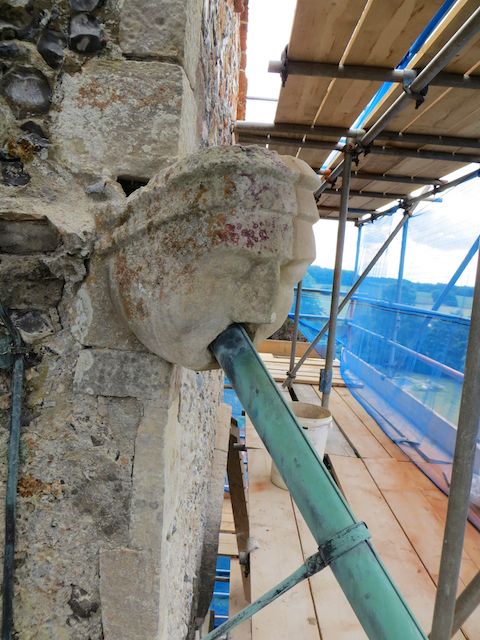
From the old side of the gargoyle again

From the old side of the gargoyle again

Looking up at the gargoyle

Looking up at the gargoyle

Roger and Will are continuing with work on the tower including further work on the sound openings and inside the tower and bell chamber.

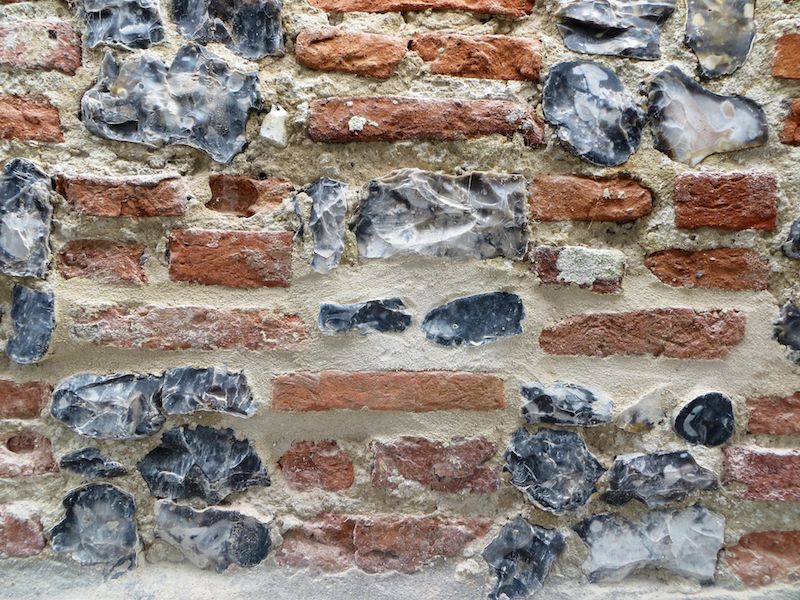
Will has repaired the damaged “chequer board”, an example is shown below.

Chequer board effect needing repair

Chequer board effect needing repair

Repaired chequerboard

Repaired chequer board

Many thanks to Roger, Will and Brett for their help.

Repairing the Gargoyle, installing louvres and other work.

In this post we will be updating you on the work in progress on the tower – for the first post in this series please click here.

*** IMAGE HEAVY POST – MAY TAKE SOME TIME TO LOAD ***

On Wednesday 4th September Brett, the stone mason, began his work to repair the broken gargoyle.

The first stage of his work involved cutting out a block from the tower so he could embed the block of stone needed to repair the gargoyle.

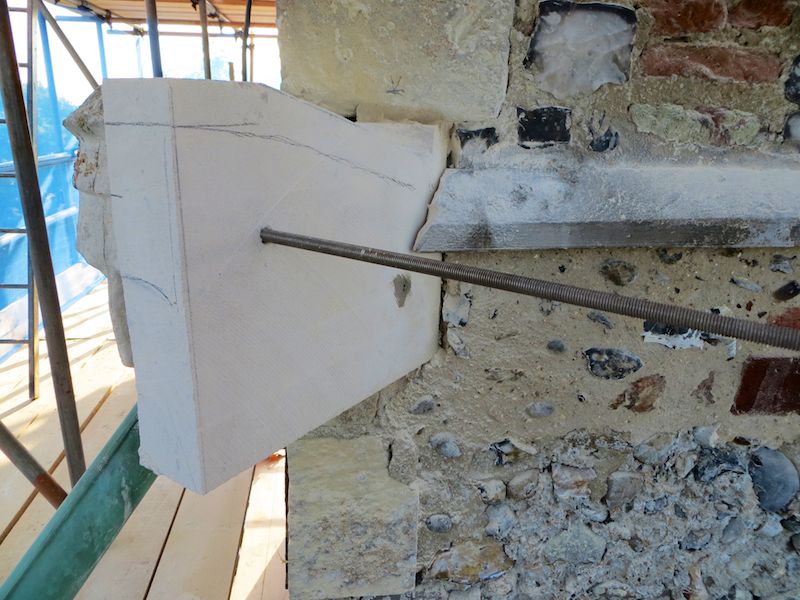
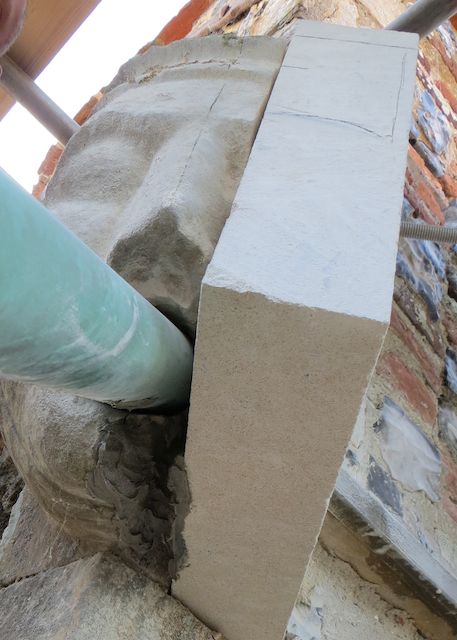
Brett cut a 14 and a half inch tall block of stone (the height needed to carve the gargoyle’s face) at one end so it would fit in the tower wall.  With Will’s help Brett offered the stone block up and marked where the inside cuts were needed – the inside cuts are to allow the new stone to sit flush to the old stone and also to accommodate the water pipe.
Freshly installed block being prepared for carving

Freshly installed block being prepared for carving

Once the inside of the block was shaped Brett fixed it in place using an epoxy resin glue and also by pinning it in place with substantial steel pins (just over five inches in length.)  The long pin shown above was temporary whilst the epoxy resin glue dried.

There is a gap between the old and new stone – once the carving is complete Brett will fill the gap (“pointing”) with a lime mortar.  This lime mortar includes lime from stones Brett has ground and shaped in his workshop – the dust is collected and filtered (to keep out any unwanted debris or larger lumps of limestone) and reused.

On Thursday 5th September Brett began the job of carving the outside of the block to recreate the face of the gargoyle.

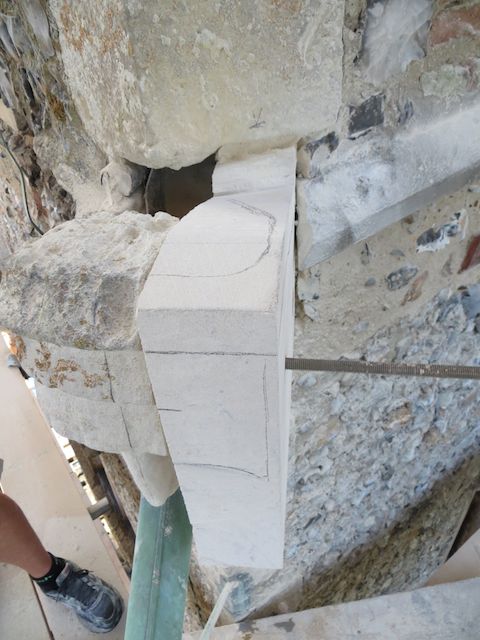
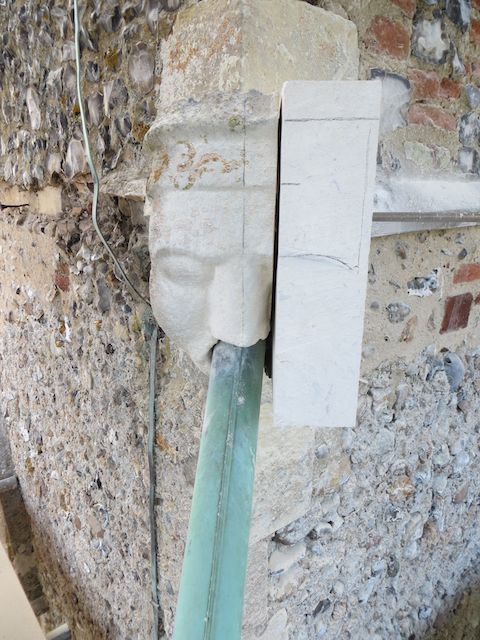
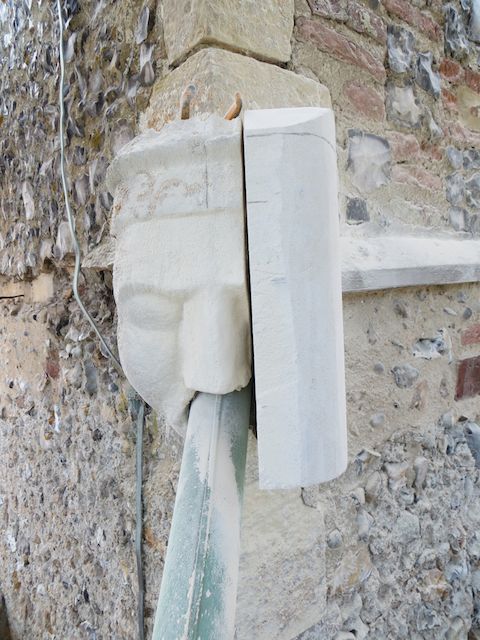
The first stage involved marking the centre point of the face and transferring the main features to the stone block before grinding the stone away to create the curve of the face and then to carve the finer details.
Block marked up prior to shaping
Block marked up prior to shaping

Marked up block from the front
Marked up block from the front

Underside of the block showing the join into the tower
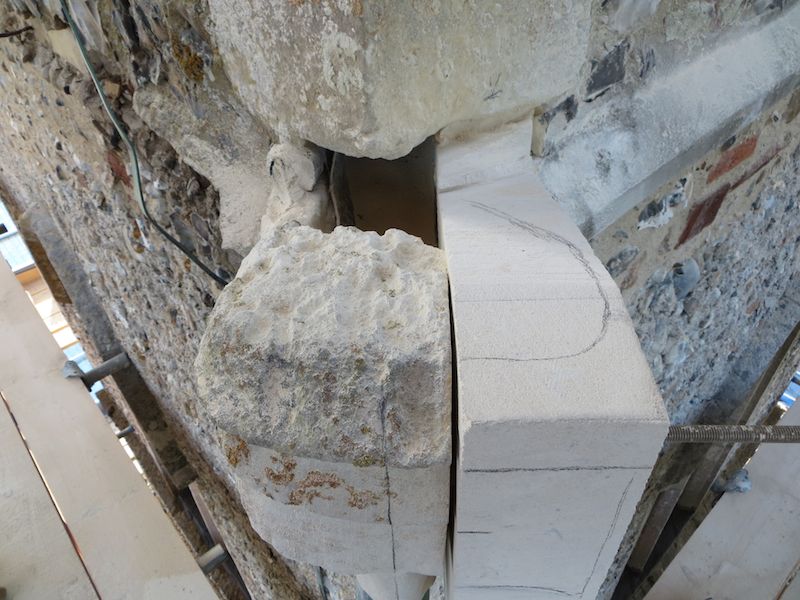
Underside of the block showing the join into the tower

Block from the top showing the join with the tower and water pipe

Block from the top showing the join with the tower and water pipe

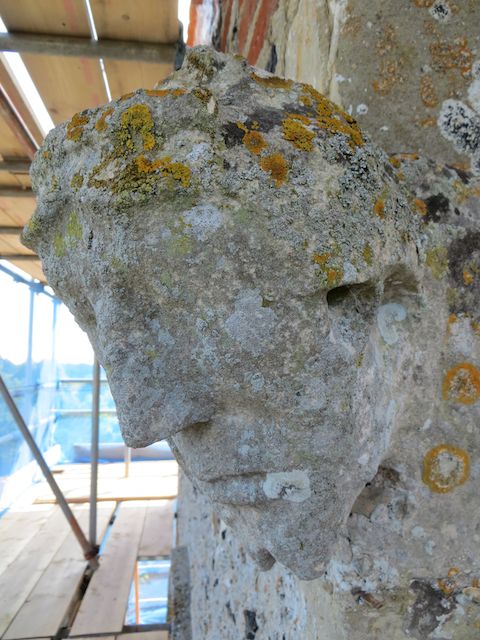
Details Brett has to consider include the puffed out cheek, lines defining the face (possibly representing a hairline or hair covering) and the fact the old side of the gargoyle is worn down.

The following pictures were taken during the first day of carving and show progress from the marked up stone block towards the final gargoyle.
The first curve
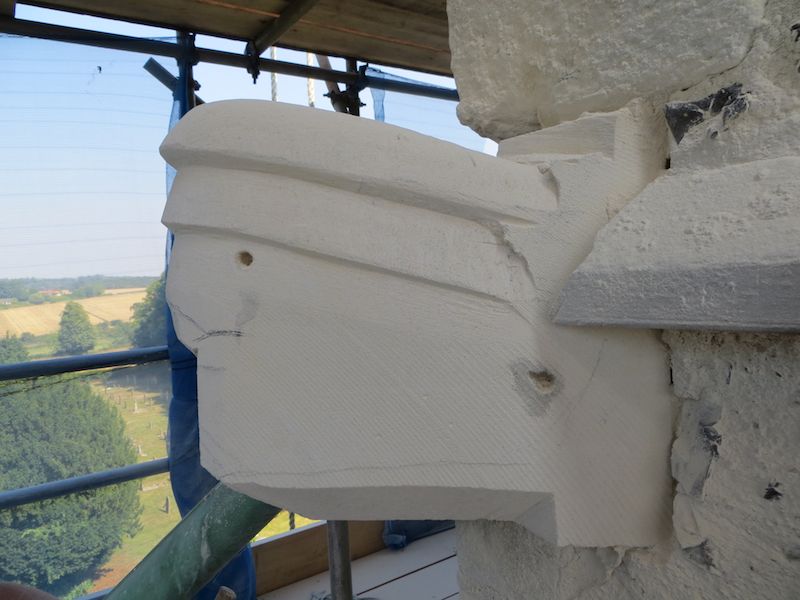
The first curve

Side view of the block with the major lines framing the face
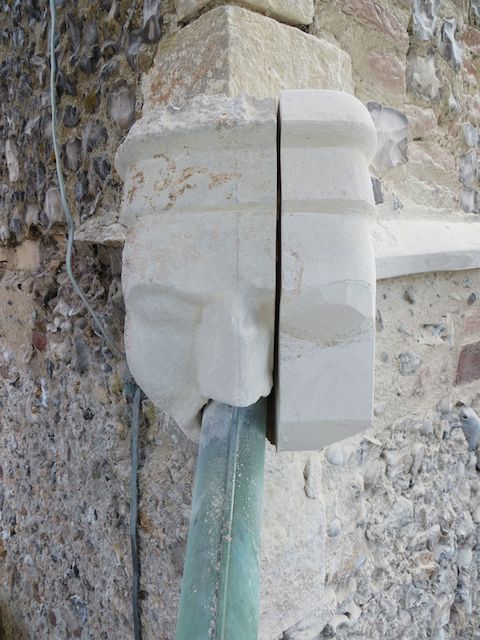
Side view of the block with the major lines framing the face

Starting to shape the eye
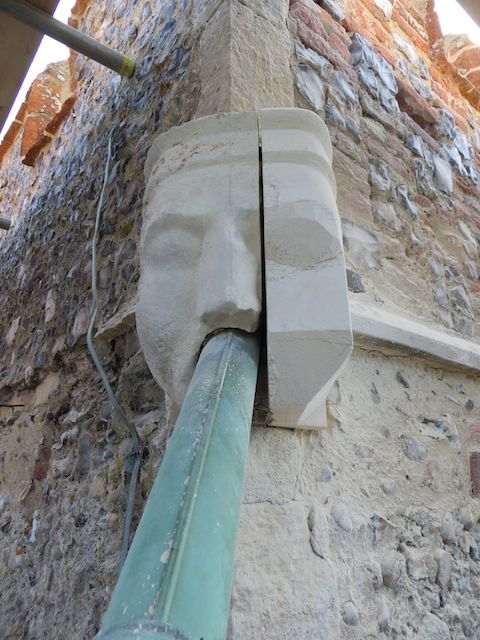
Starting to shape the eye

Creating the angle for the cheek and jaw
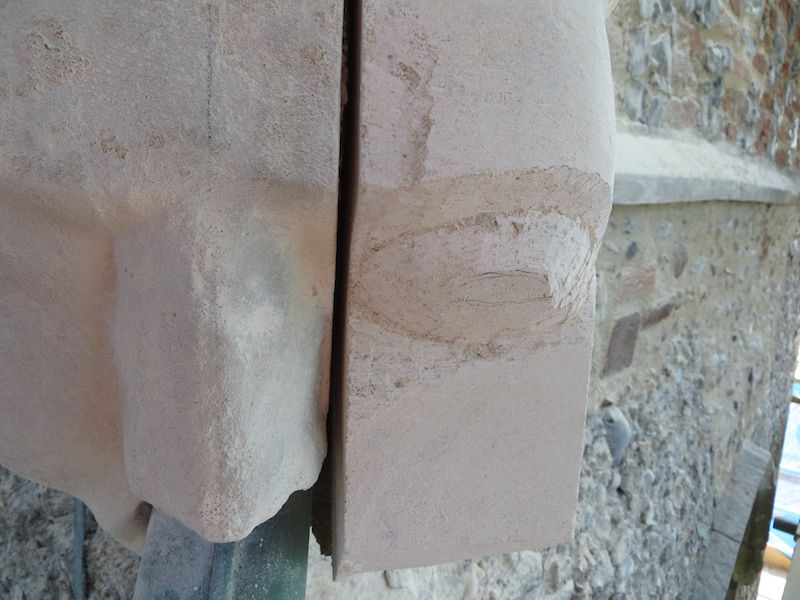
Creating the angle for the cheek and jaw

Eye detail at the end of the first stage of shaping the stone
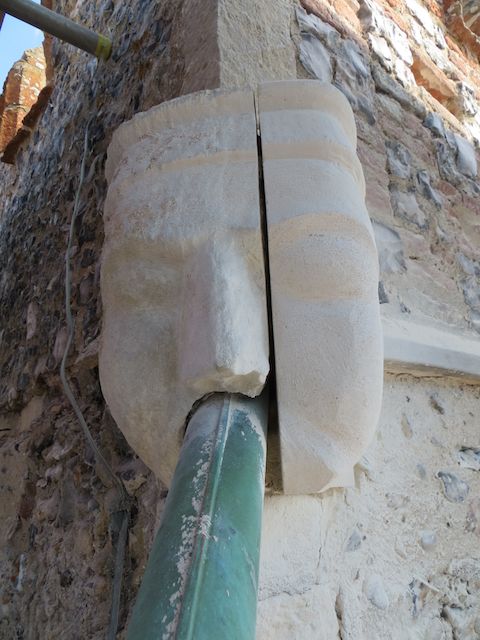
Eye detail at the end of the first stage of shaping the stone

Gargoyle at the end of the first day
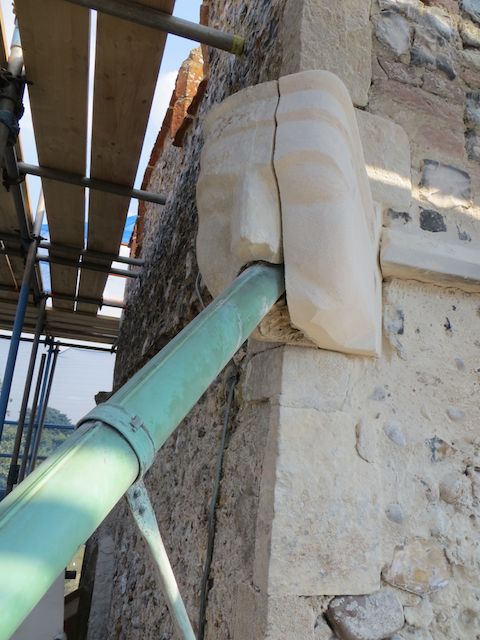
Gargoyle at the end of the first day

At the end of the first day of carving

At the end of the first day of carving

The top of the new side is smooth, one of the last stages will be to mimic the surface of the old side by chiselling dimples to match the old side.

Brett also has to cut the stone above and under the actual gargoyle to match the join to the tower on the old side.
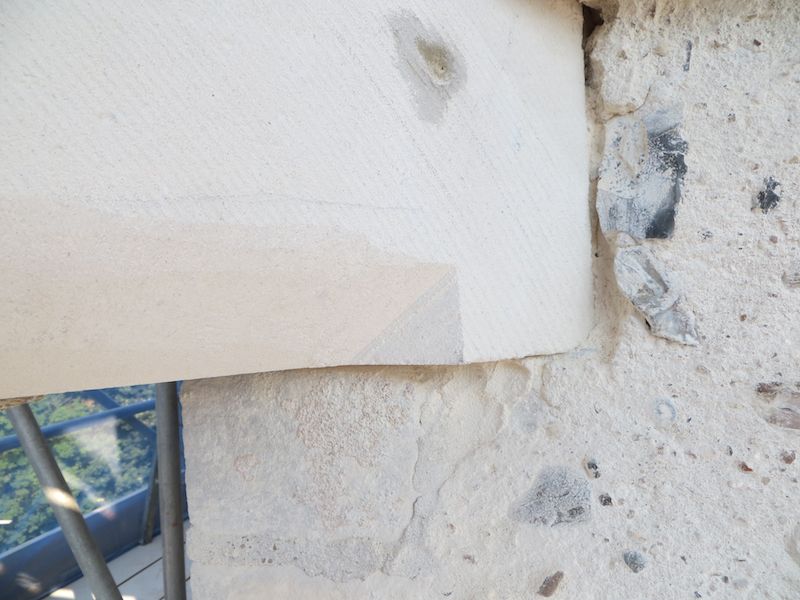
Starting to shape the bottom of the stone towards the join with the tower
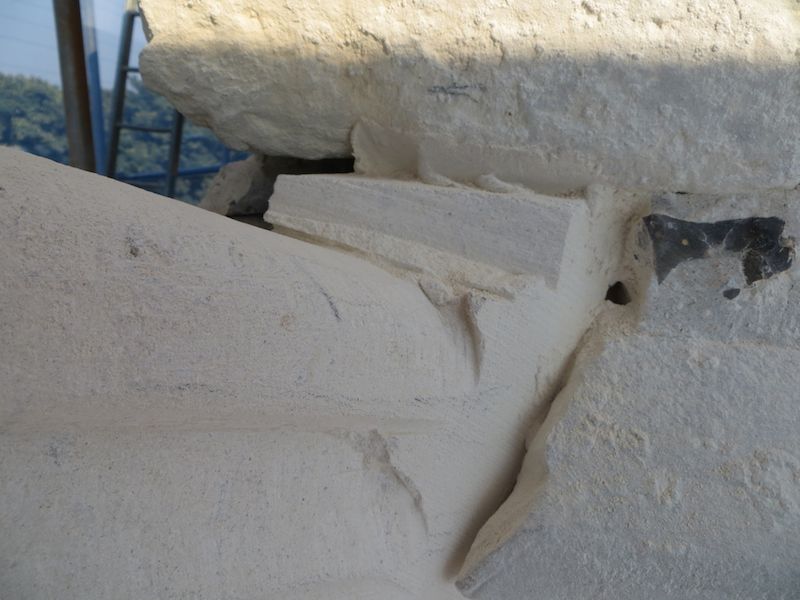
Starting to shape the bottom of the stone towards the join with the tower

Starting to shape towards the top join with the tower

Starting to shape towards the top join with the tower

Looking at the features of the gargoyles and grotesques Brett estimated that they would have been installed when the tower originally went up or shortly thereafter.  There is no documentary evidence to confirm when the current tower was built but it is believed to have been in the 14th Century.

Roger and Will have been installing the louvres.  These have been made from European oak – the trees have their branches removed as soon as they start to form, this means that there are hardly any knots in the wood giving lengths of strong wood with a fine grain unlikely to warp over time.
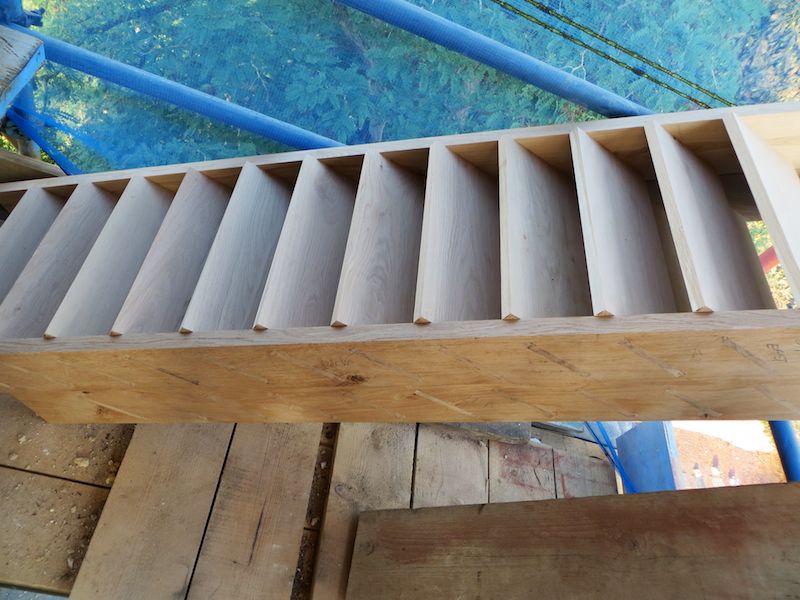
Louvre awaiting installation

Louvre awaiting installation

The bricked up sound openings have had the outside of the brickwork rendered prior to the louvres being installed.

The louvres were made to precise measurements – they fit into the sound openings solidly.  They are fixed to the stonework of the sound openings with long steel screws.
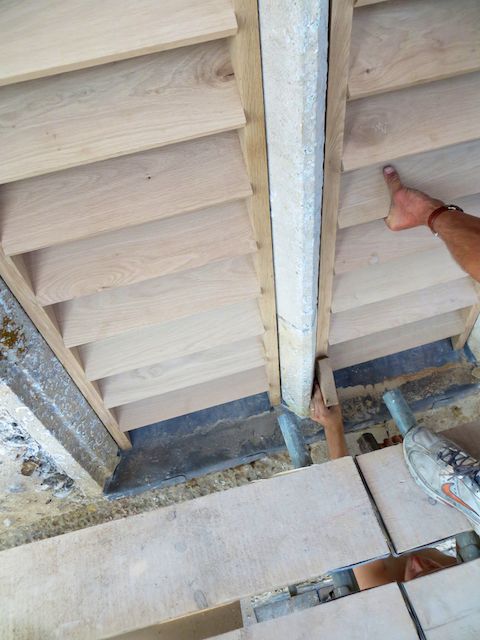
Tapping the louvres into position

Tapping the louvres into position

Tapping the louvres into position at the top

Tapping the louvres into position at the top

Checking the installation
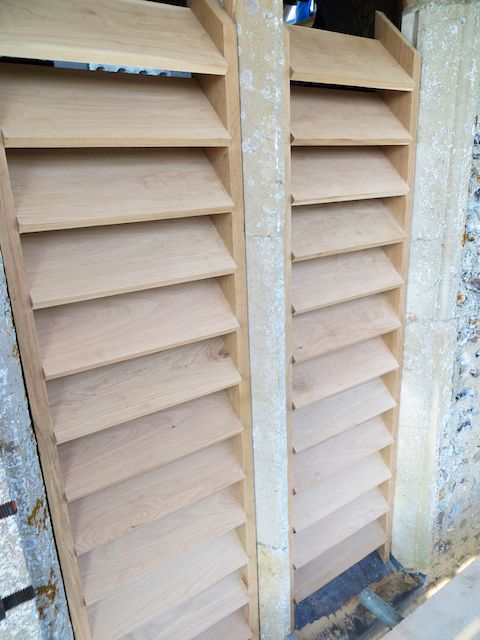
Checking the installation

Installed louvre

Installed louvre

Behind the louvres a steel grid has been installed to prevent bats entering the tower.  The steel is 12 gauge and the grid is rectangular (75 by 12 mm).

For the time being access to the inside of the tower is still needed so the louvres on the west side are not yet installed.

Other repairs that have been done since the last post include:

  • repairing the clock casing – Roger has removed the damaged wood and re-built the casing as required.  The next stages of work on the clock are painting, re-fitting the face and completing the casing around the face.
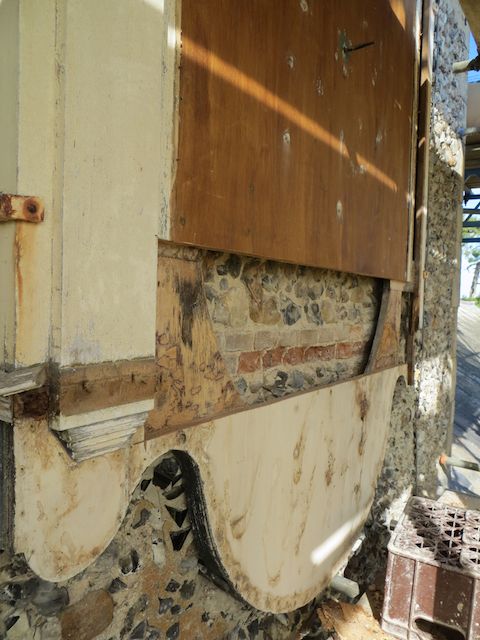
Clock casing

Clock casing with damaged areas removed
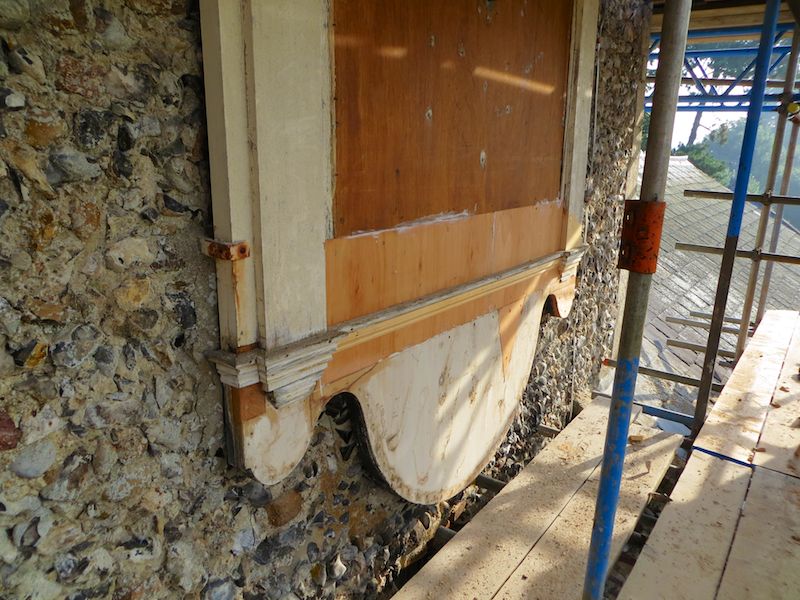
Clock casing after repair

Clock casing after repair

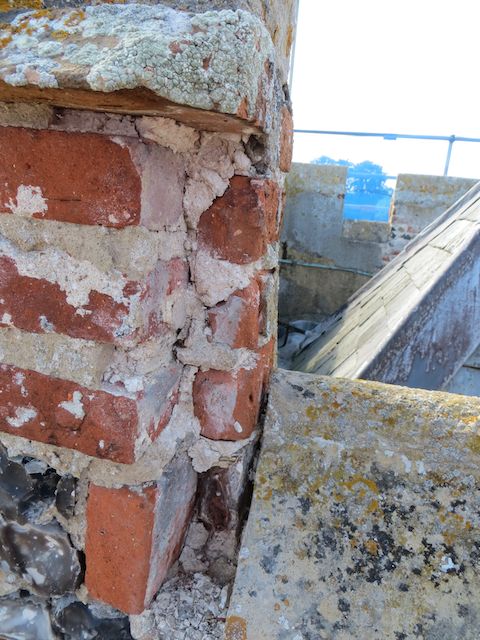
  • pointing and repairs to the crenellations.
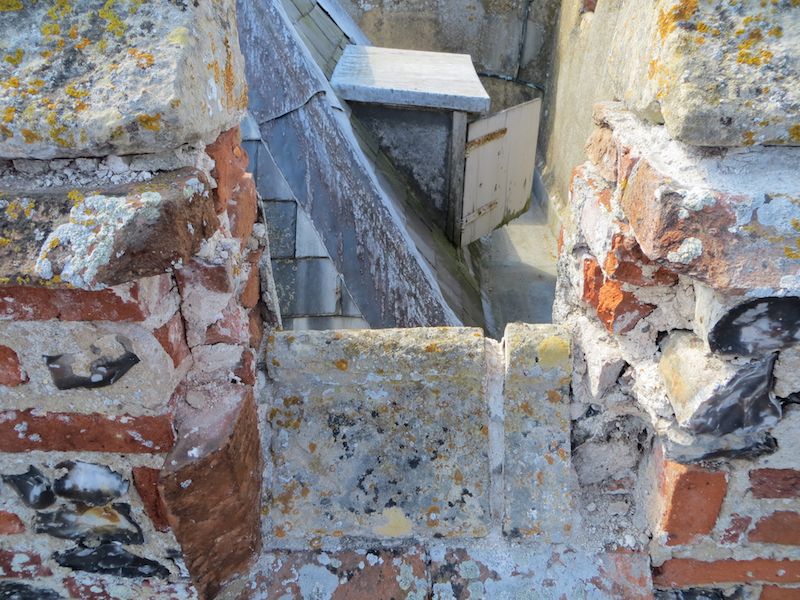
Example of repairs needed at the top of the tower 1
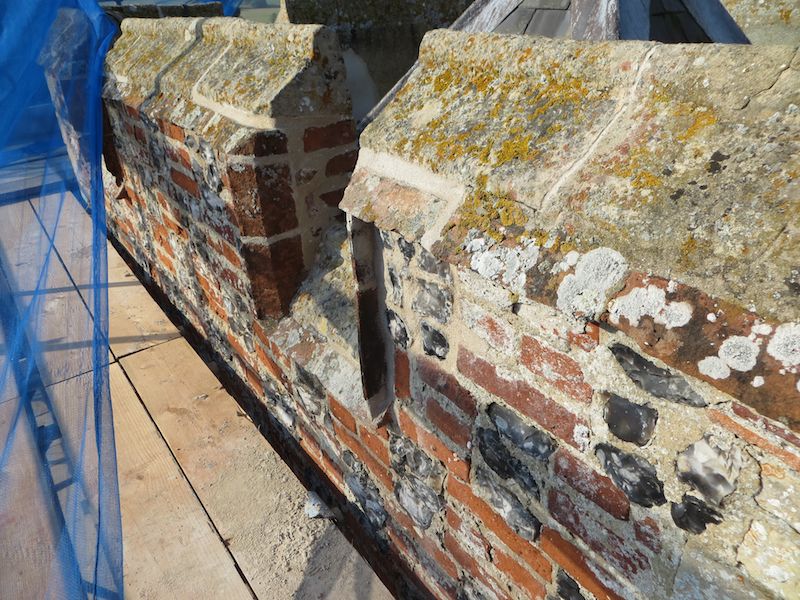
Example of repairs needed at the top of the tower

Example of repair at the top of the tower

Example of repair at the top of the tower (this is the same area as the previous picture from a different angle.)

Many thanks to Brett, Roger and Will for their help.
Building work on the Tower

***THIS POST CONTAINS A LOT OF PHOTOGRAPHS – IT MAY TAKE SOME TIME TO LOAD***

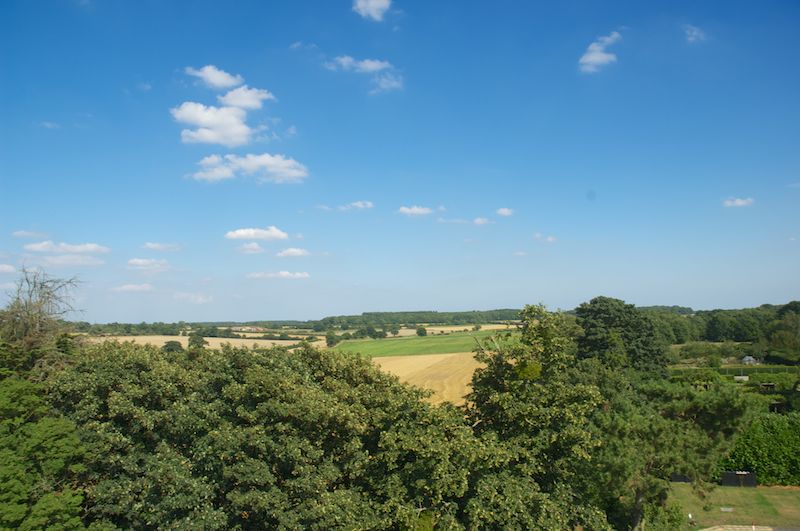
The view from the tower on 29th August 2013

The view from the tower on 29th August 2013

On Thursday 29th August, a beautiful summer’s day, we joined Roger and Will Tyrrell on the scaffolding currently encircling the church tower for an update on the work strengthening the tower ready for the return of the bells.

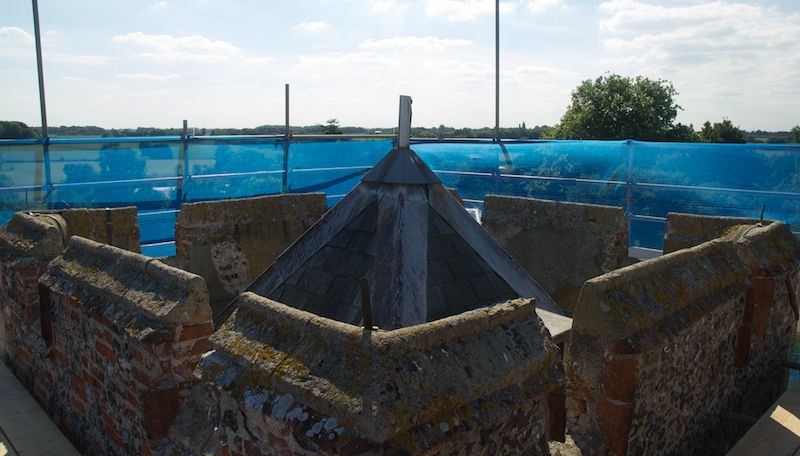
The very top of the tower

The very top of the tower

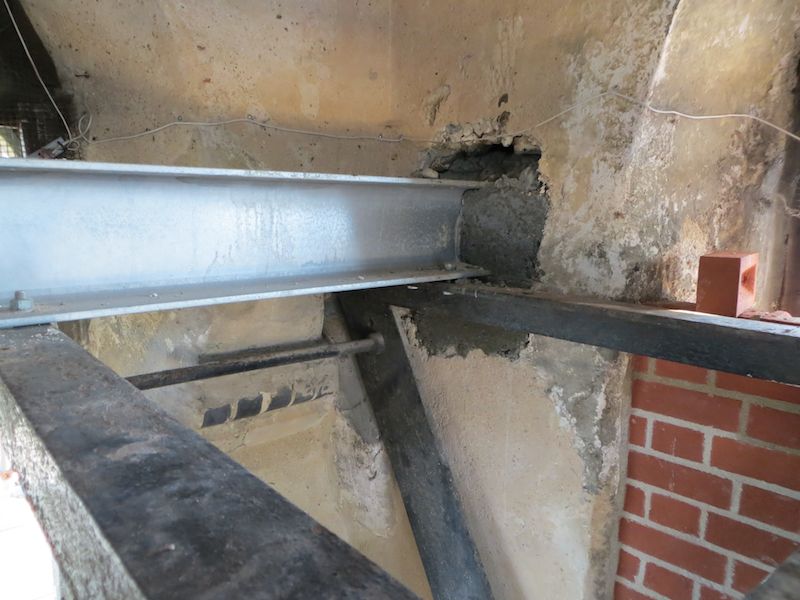
Inside the tower the new beams we saw at the foundry have been installed.  This is a very precise installation as these beams are a part of the supporting framework for the bells.  Roger explained that, in order for the beams to be held solidly, it was necessary to ensure that the cement mix fixing the beams to the tower was firmly packed into all the space, not only around the beam but also behind the plate at the end of the beam. This will ensure the stability of the bell installation.

Showing the beam joint with the tower wall - photo by Roger Tyrell

Showing the beam joint with the tower wall – photo by Roger Tyrrell

Showing the level of the new beam from the outside

Showing the level of the new beam from the outside

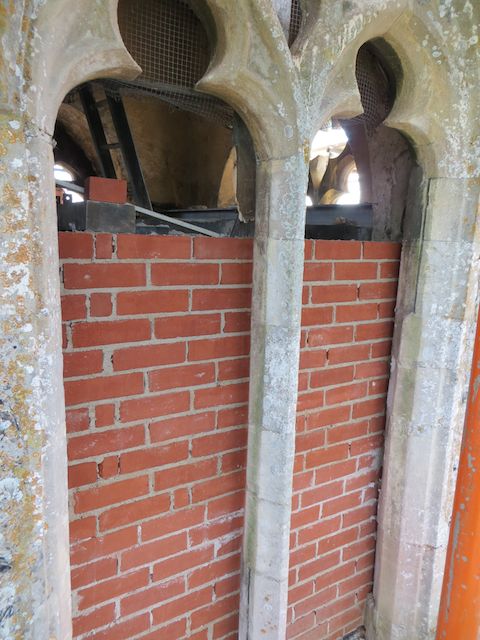
Two of the sound openings have been bricked up to increase the stability of the tower – the brickwork is double skinned, every other course of bricks has a steel grid through it allowing the two skins to be tied together; where the brickwork meets the stone of the tower thin steel rods have been embedded 10cm into the tower stone and fixed with resin to make the join solid; the gap between the two skins is filled with concrete; the outside of the brickwork will be rendered and then the oak louvres will be installed over the opening.  The oak louvres are made with joints designed to prevent the incursion of water and also to allow for expansion of the wood.  Initially the oak louvres will be quite bright against the tower, as they weather they will blacken before reaching their final oak shade.

Sound opening being bricked up

Sound opening being bricked up

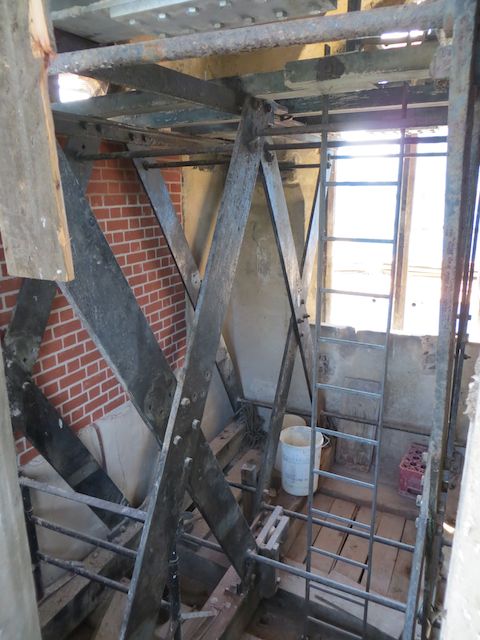
Sound opening and the X frame

Sound opening and the X frame

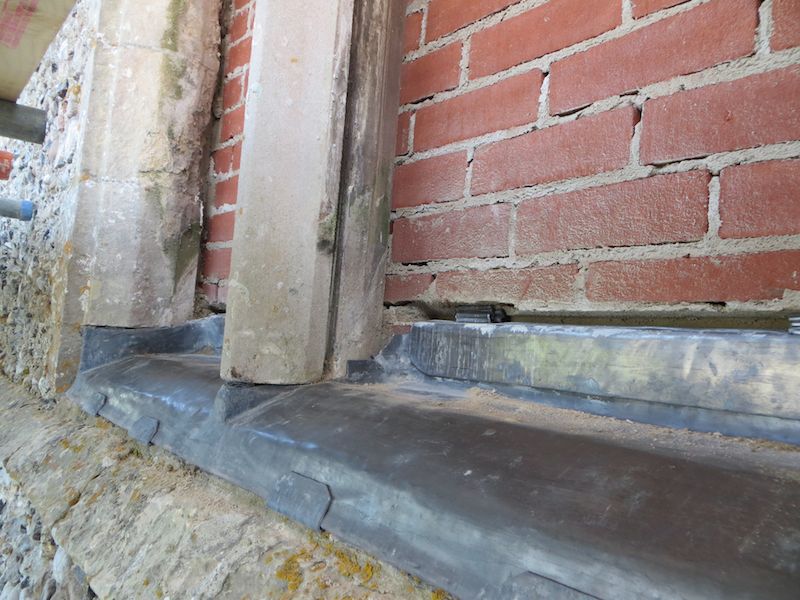
The base of the sound openings have all been re-leaded to ensure no water can enter and cause damage to the structure and thus the stability of the tower.

Leadwork at the base of one of the sound openings

Leadwork at the base of one of the sound openings

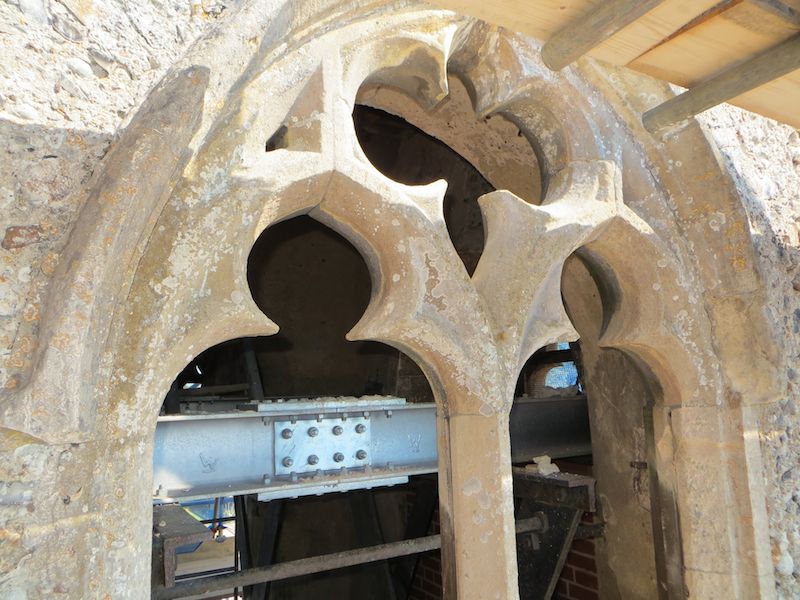
In the above photograph you can see a groove cut into the central upright of the sound opening.  This is a groove for window glass.  There have never been windows in the sound openings and only a few of the stones show grooves for holding glass.  This suggests that these stones have been taken from another church and reused in the tower at St. Mary’s.  Reusing stones from ruined churches was common practice and the Diocese stored such parts which had the potential for reuse.

The clock face has been removed for restoration – the entire face has been removed and will be primed, repainted and gold leaf applied before being reattached – once it has been reattached the face will be touched up to cover the points where the it has been screwed back onto to the casing.

The face of the clock goes here

The face of the clock goes here!


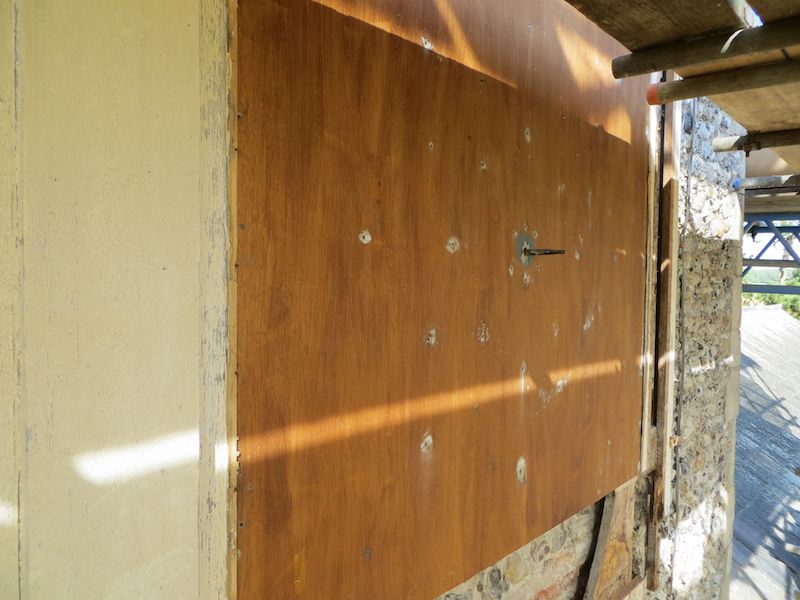
Clock casing

Clock casing

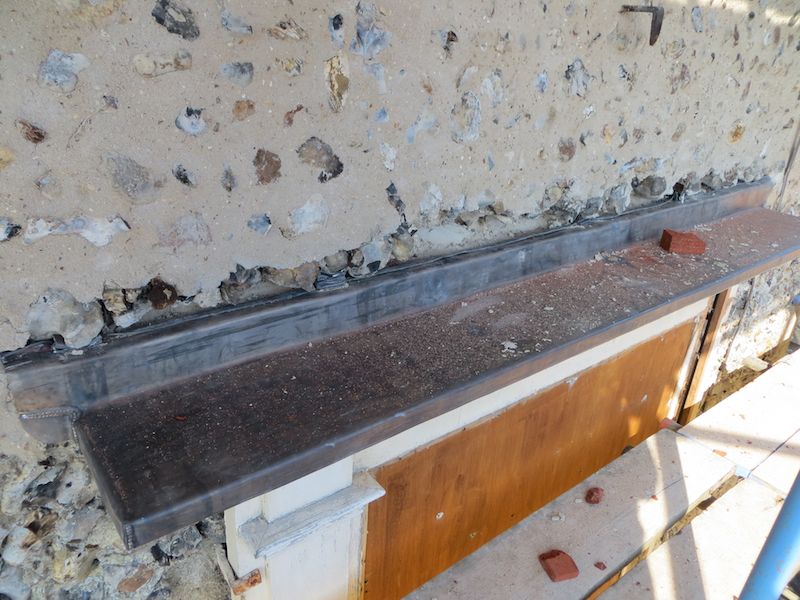
There was considerable water damage to the woodwork supporting the clock face which is being repaired.  The lintel at the top of the clock was badly damaged and allowed water to penetrate the clock face casing; this has been repaired – the damaged stonework has been cut away and a course of bricks has been inlaid and the whole ledge has been beautifully leaded in a way to ensure that no water will be able to penetrate the clock face, the casing or the supports in the future.

Lintel above the clock - cut out, brick course installed, leaded

Lintel above the clock – cut out, brick course installed, leaded

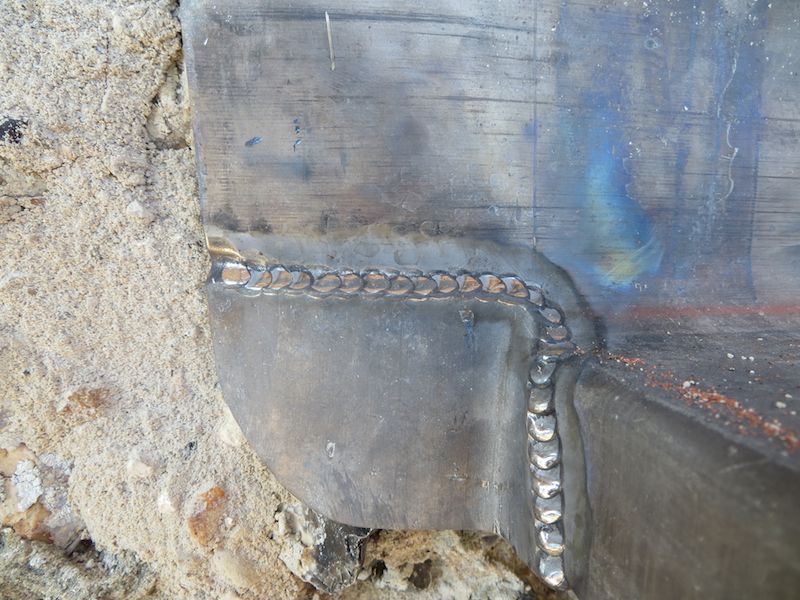
Soldering detail on the lead work

Soldering detail on the lead work

With the scaffolding up it is possible to closely examine the tower and perform any other maintenance and repairs needed.

The following pictures show some of the general repair work required at the top of the tower:

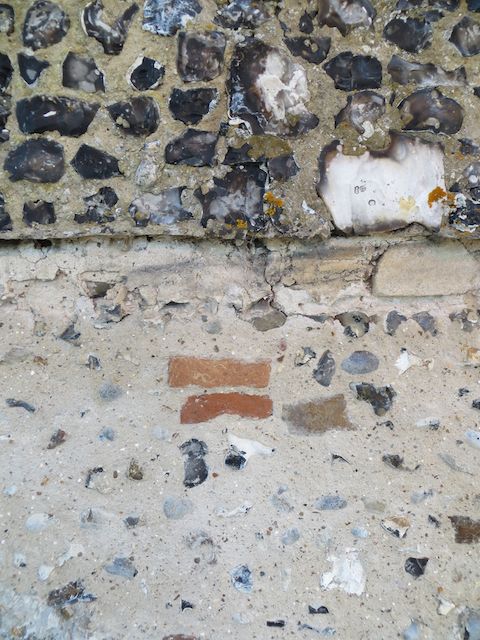
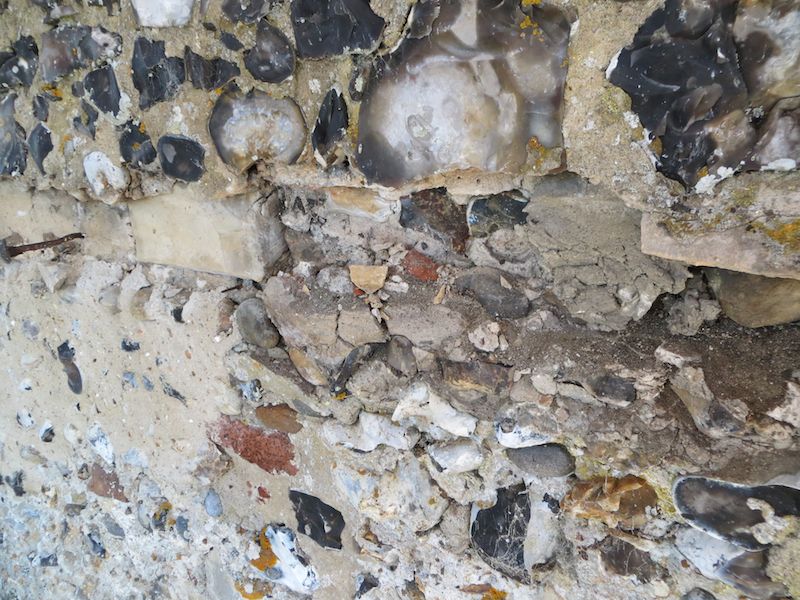
Example of repairs required at the top of the tower 3 Example of repairs required at the top of the tower 2 Example of repairs needed at the top of the tower 1In several areas the mortar around the flint work has deteriorated.  In these areas the old mortar will be cut out and replaced with new mortar. The new mortar is made to a “recipe” as close as possible to the original mortar (English Heritage have studied mortar used on churches etc and have a recipe!).  The mortar includes a couple of handfuls of grit, stones of approximately 10mm diameter and chalk lumps (which allow the mixture to “breathe”).  Goat hair also goes into the mix to add strength.

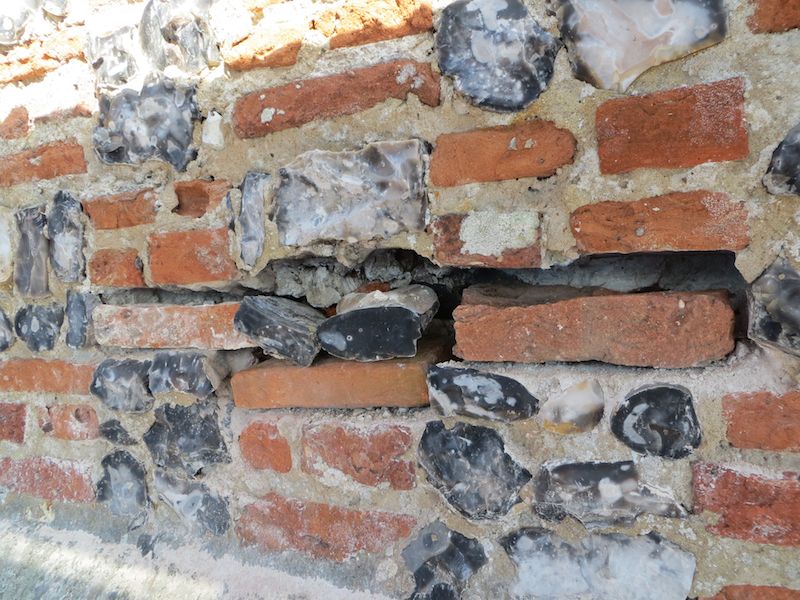
Old mortar cracking

Old mortar cracking

Here the old mortar has been cut away

Here the old mortar has been cut away ready to be re-done

High up on the tower there is an interesting chequer board effect created by squares of flint work and squares of red brick – several areas need repair.

Chequer board effect with loose brick

Chequer board effect with loose brick

Chequer board effect needing repair

Chequer board effect needing repair

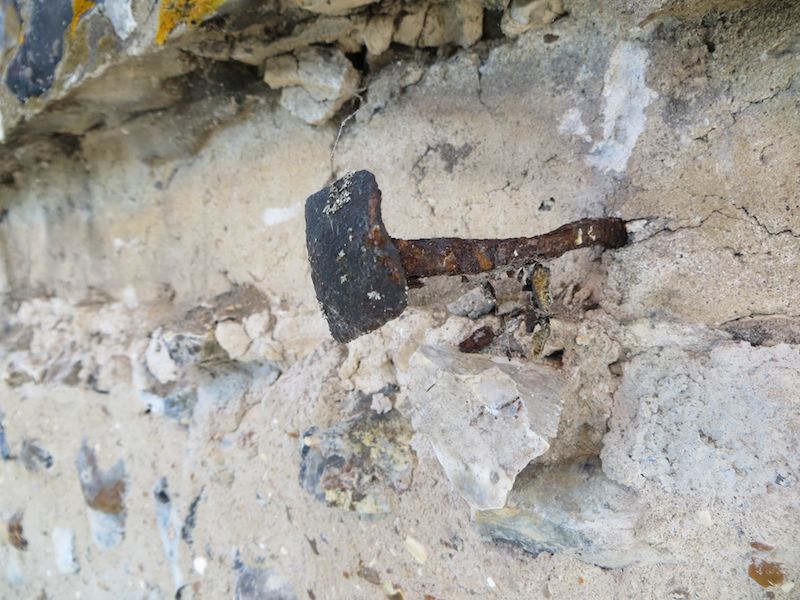
On the North face of the tower a string course had become dangerous.  In a previous repair (probably when the bells were last re-hung!) the flint work under the string course was re-mortared and mortar was built up under the string course to strengthen it.  This repair hasn’t stood the test of time.  The string course has been cut away (to reveal a nail which was helping to support the stonework) and will be repaired with a new string course which will be firmly seated in the cut away area.

Showing the previously repaired area under the string course

Showing the previously repaired area under the string course

String course - nail on the left of the picture was supporting the stonework which has been removed

String course – nail on the left of the picture was  helping to support the stonework which has been removed

The nail a little closer

The nail a little closer

Close up of the nail

Close up of the nail

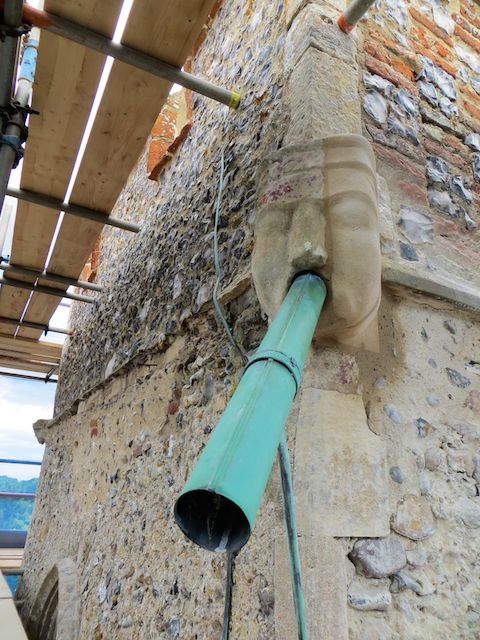
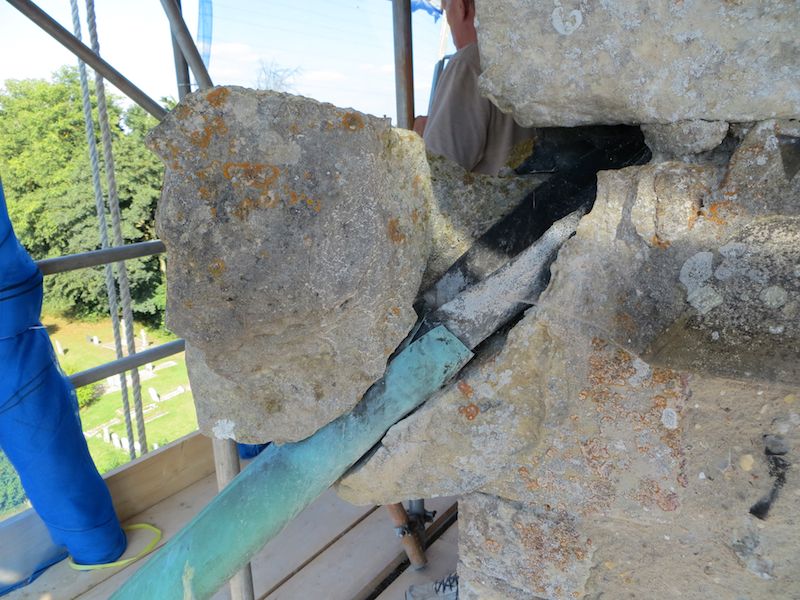
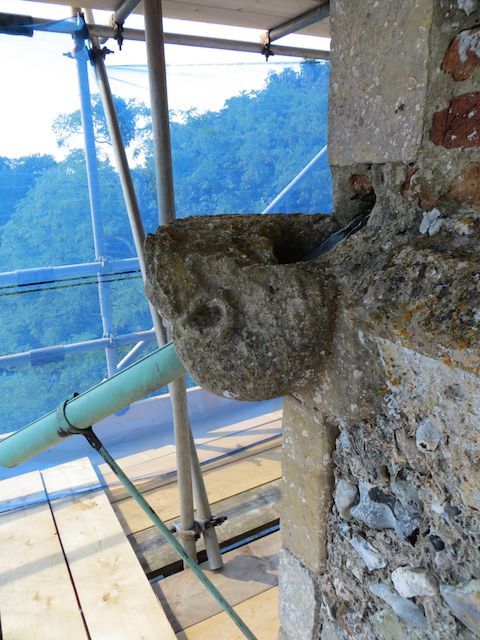
There are gargoyles and grotesques on the tower – grotesques are decorative; gargoyles allow for water to flow from the tower.  One of the gargoyles has lost half of his face, leaving one side of the water pipe fully exposed.  This is not safe.  This gargoyle will have a new half face firmly stapled to the remaining half gargoyle to repair and make him safe.

Gargoyle - Broken side view

Gargoyle – Broken side view

Gargoyle - Broken face on

Gargoyle – Broken face on

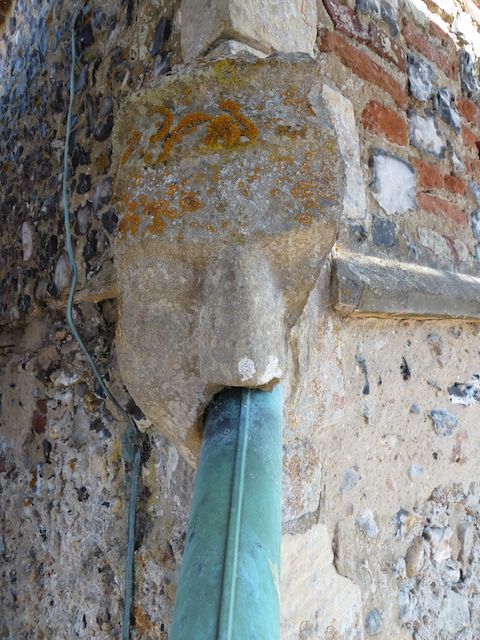
Gargoyle no 2 face on

Gargoyle no 2 face on

Gargoyle no2 side with ear

Gargoyle no2 side with ear

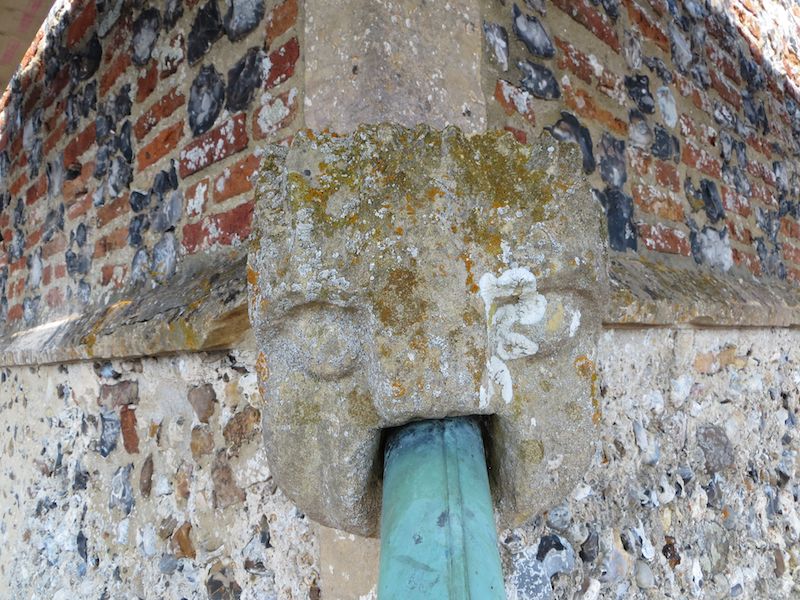
Grotesque 1 face on

Grotesque 1 face on

Grotesque 1

Grotesque 1

Grotesque 2

Grotesque 2

Grotesque 2 side view

Grotesque 2 side view

Grotesque 2 looking down

Grotesque 2 looking down

I would like to thank Roger and Will for their help with this post and for helping me get up and down the ladders!

17th August

On Saturday 17th August the church will be manned from 10.30 am to 4.30 pm and refreshments will be available in the church room.

This is the last introductory day for our church trail – after Saturday the trail documents will be available at the back of the church but we can’t promise that there will be help on hand should you get stuck with any of the questions!

Most of the answers to the question sheets are in the trail documents; there are answer sheets available hidden in the white envelope alongside the trail documents and question sheets with all the answers on should you need a little help.

We are very grateful to local artist Clive Brooks for creating a colouring in sheet for our younger visitors – coloured pencils are available at the back of the church with the trail documents.  The picture is of one of our oldest pieces of stained glass – St. Edmund – which can be seen in the window to the left of the altar.

Edmund offering his arrows

Edmund, King of East Anglia, offering up the arrows of his martyrdom

If you would like to download the church trail documents in pdf format they are available here.

Open Churches week

From Monday 5th August we will be joining in Open Churches Week. The Church will be open and there is a book stall by the Church Room.

*** At some time during the week scaffolding will be being erected around the Tower – at this time entrance to the Church will be via the Priest’s Door.  This entrance is very awkward so please take extreme care when going in and out of the Church.  ***

Our new Church Trails are available at the back of the Church:

  1. Inside the Church
  2. Outside the Church
  3. The Stained Glass
  4. Question sheets for children up to the age of 10
  5. Question sheets for children 11 and over
  6. Colouring sheet for children of all ages
  7. Answers to the question sheets (inside the white envelope – no peeking!)

If you would like to download the Church Trail documents in .pdf format they are available here.

Today (3rd August) and tomorrow (Sunday 4th) we are also opening the church – refreshments are available in the Church Room.  Refreshments will also be available next weekend (10th and 11th August) and we will be open on 17th August too.  On these days only we will be able to show you films relating to our bells whilst you enjoy your tea & coffee.

The films we have are:

  • The bells being rung on 31st March 2013 – Easter Sunday;
  • Casting the new bells;
  • Tuning a bell;
  • Simon Rudd’s talk (Part One);
  • Simon Rudd’s talk (Part Two);
  • Simon Rudd’s talk (Part Three).

One of the next stages of our project is to upload our films to youtube so if you are unable to stay to watch them when you visit the church don’t worry – we will let you know when they are available online.

Calligraphy workshop

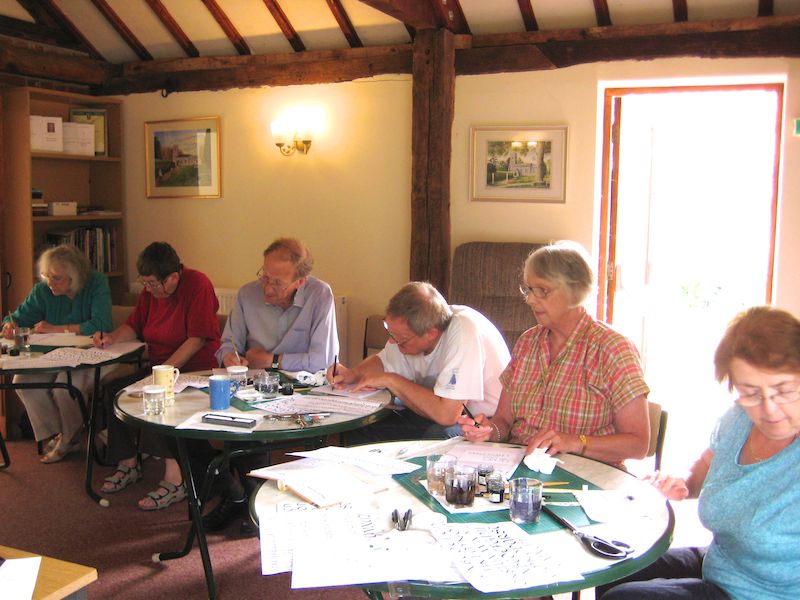
On Saturday 27 July a group of enthusiasts attended a Calligraphy Workshop. Storm explained the origins of writing and how the art of calligraphy had spread across the world. She also described the various types of “paper” from marks on the ground or on trees to clay tablets, birch bark and parchment. She explained the different types of ink and brought along samples of iron gall ink and walnut ink.
Working hard mastering insular half uncial.

Working hard mastering insular half uncial.

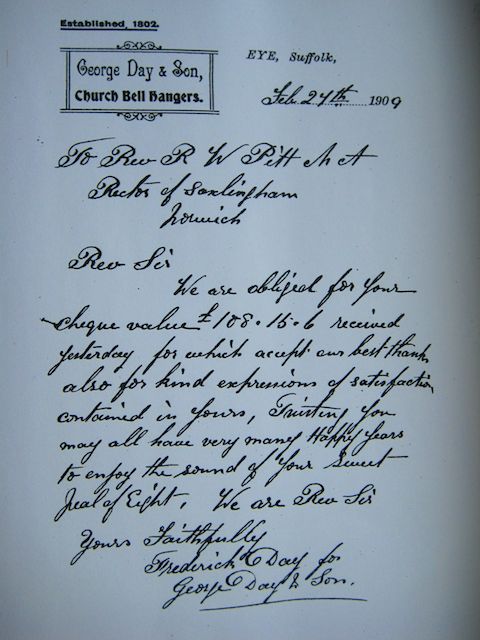
Storm proceeded to involve all the participants in practising writing scripts starting with insular half uncial script – examples include The Book of Kells and the Lindisfarne Gospels – moving on to an italic script similar to that used in the early 1900s using the receipt for the previous bell work (written in 1909) as an example.  (To see an enlarged image of the receipt click here.)

Receipt for 1908 work.

Receipt for 1908 work.

 Many different types of pens were used from a modern felt tip calligraphy pen to dip pens with flexible nibs and square cut nibs, a music writer’s stave pen and a three tine pen for writing music notes. There was also a glass pen, a reed pen and an ultra modern tin can pen which gave some fine large letters and figures. Those who wished to cut quills from goose feathers.
Everyone had the opportunity to use all the various pens and used the scripts to which they had been introduced to make bookmarks on parchment or Christmas cards.
A very enjoyable time was had by all – and no-one spilt ink on themselves  or on the carpet!

Genealogy workshop

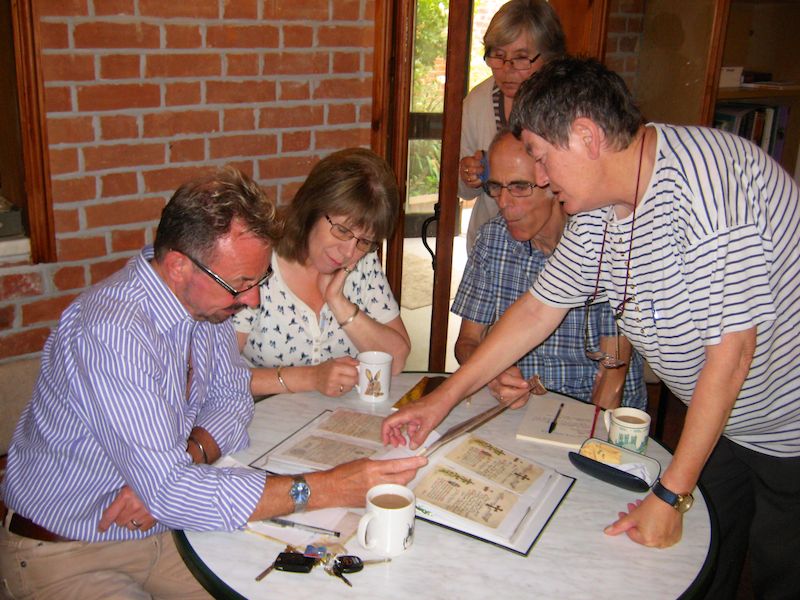
Lynn showing Chris, Sue and Paul her grandfather's discharge papers from Merchant Navy.

Lynn showing Chris, Sue and Paul her grandfather’s discharge papers from Merchant Navy.

On the morning of 20th July a dozen people gathered in the Church Room for our first Family History Workshop. We had decided to make this a beginners’ workshop although some participants had already done some work on their family trees.

Lynn started by explaining that the place to start on a family tree was with oneself – in fact, you cannot sensibly start anywhere else as all subsequent information which you gather is based on your own history. She then went through the various forms of certificates explaining the information which each one contains and discussing the changes in birth and death certificates from a landscape format to a portrait format in 1969 and the extra details which were then required. She also stressed that information may not be absolutely correct – our ancestors  have been known to “improve” registrations!

She also pointed out that, when information was transcribed from the original document onto a computer, that step also gave room for errors to be made. Double check everything!

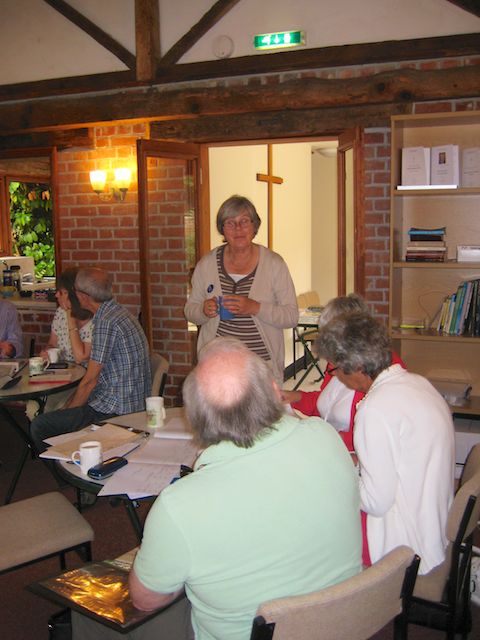
Corinne discussing internet resources with attendees.

Corinne discussing internet resources with attendees.

Corinne then discussed the various websites which are available including Ancestry, Genes Reunited and Family Search. She spoke about the masses of information which is available on the Internet, and pointed out that though some sites required taking out a subscription others were free and some of the subscription sites offered, for example, a fourteen day trial period. She finished by warning that family history research is addictive and that she herself had often been found at her computer at two o’clock in the morning still looking for that elusive relative!

Joan then laid out a piece of research done by her into her husband’s family, in particular Thomas Claydon Baldwin. She pointed out that without the middle name of Claydon it would probably have been impossible to track down the correct Thomas Baldwin (many of Thomas’ descendants still carry the name of Claydon as a middle name).

She traced Thomas’ birth and childhood in Essex and through his military career in England, India and Ireland. She discussed his two marriages and the birth of twins – a boy and a girl – in barracks in Ireland and the death of his second wife just a few days after the birth of the babies. She passed round birth, death and marriage certificates, census returns and wills. This was indeed fascinating as it put ‘real’ people into the forefront of research.

After a welcome cup of coffee, everyone settled down to look at some of the photographs, certificates and wills which had been discovered by Corinne, Joan and Lynn during their research.

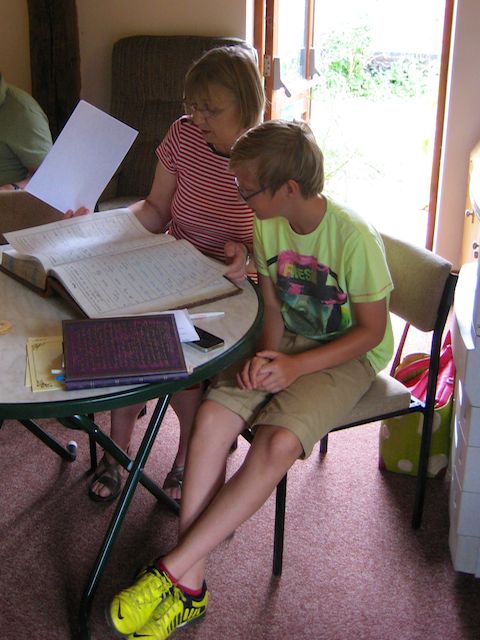
Fraser and his grandmother, Pauline, searching through the Burial Book.

Fraizer and his grandmother, Pauline, searching through the Burial Book.

Those people with local ties were very interested in the Saxlingham Burial Book which dates from 1906 (earlier ones are now deposited with Norfolk County Record Office). Those who wished to borrowed books, general magazines and Lancashire Family History Society magazines to take home.

All in all, everyone enjoyed themselves and we hope we have now encouraged people to start their own family history research!

On 21st September we will hold a second workshop – if you are interested in attending please contact Lynn by emailing info@saxlinghambells.org.uk or by phone.  Her number can be found in the Churchwarden’s section of “Contact.”


Talk on Bell-ringing by Simon Rudd

On Thursday 27 June Simon Rudd, the Ringing Master at the Church of St. Peter Mancroft Norwich came along to speak to us about the art of bell-ringing. It was a fascinating talk covering the history of bells and bell founding through the ages. He was ably assisted by Ben, Neil, David and Richard who demonstrated the art of change ringing on a set of handbells. We hope soon to have a video of Simon’s talk on Youtube.

Almost the entire audience of fifty people (which included, I am delighted to say our two youngest trainee bellringers, Alfie and George) then went across to the Church Room for refreshments and an opportunity to talk more about the art of bell-ringing with Simon and his colleagues.   Many thanks to them for a most enjoyable evening.

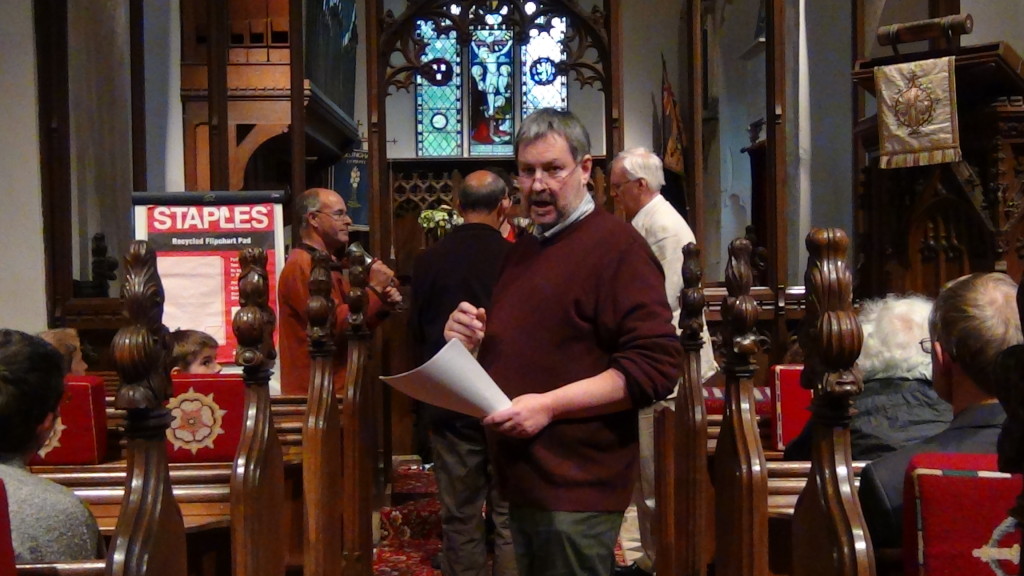
Simon explaining changes whilst Richard, Ben, Neil and David ring the handbells.

Simon explaining changes whilst Richard, Ben, Neil and David ring the handbells.